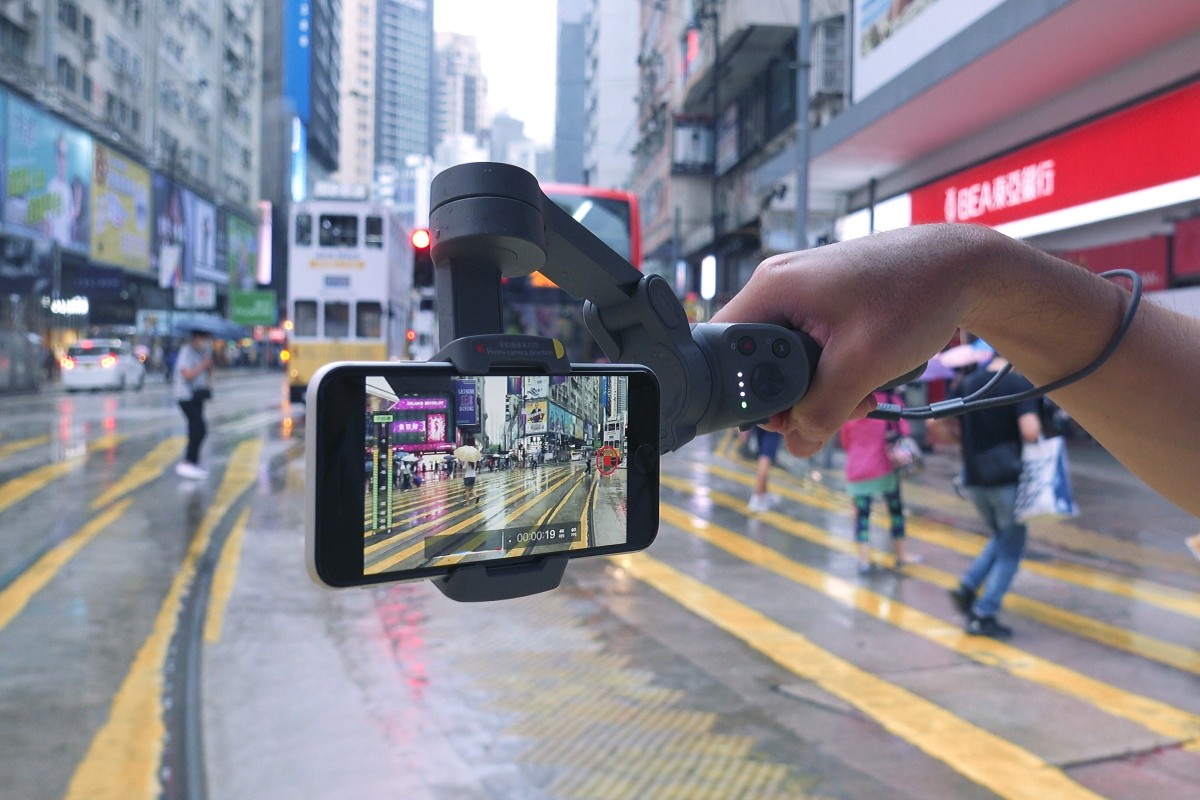
One of the perks of owning an iPhone is the great camera that comes with it. As we’ve demonstrated before, the iPhone 11 Pro is capable of shooting great-looking cinematic videos. But what if you don’t have US$1,000 to spend on a phone? Fortunately, you don’t have to. The recently launched iPhone SE starts at just US$400. Unlike its Pro sibling, the SE only has one lens. But it still shoots high-quality video. So in this guide, I’ll tell you the best tips and tricks for shooting cinematic video on Apple’s cheapest phone. BASIC SETTINGS Beginners don’t need any special apps to get started. The default iPhone camera app is perfectly capable of shooting decent video. But first you need to adjust the resolution and frame rate in the camera settings. If you’re shooting a scene without much motion, choose 4K resolution at 24fps for the best results. If the scene does have a lot of motion, bump up the frame rate to 60fps. You’ll also need to manually adjust the exposure to get the correct brightness for your shots. You can do this by long pressing the focus point on the screen and dragging the exposure slider. If you’re an advanced shooter looking for more control over your shots, I recommend Pro Camera by Moment. This app gives you full manual control over ISO, shutter speed, white balance, color profile, video bitrate, and even manual focus. While another camera app called Filmic Pro is more widely used, Pro Camera is more affordable and gets you what you need. One of the main advantages to using a camera app with manual controls is being able to set the shutter speed. For filming cinematic video, the general rule of thumb is to keep the shutter speed at double the frame rate. So when you’re shooting at 24fps, the shutter speed should be 1/48th of a second. For 60fps, it should be 1/120th of a second. Here’s a basic checklist to keep in mind when shooting with the default camera app: Shoot at 4K 24fps for a cinematic look Shoot at 4K 60fps for slow motion playback Manually adjust the exposure by long pressing the focus point on the screen and dragging the slider And for the Pro Camera users: Set the video format to H.264 Set the video bitrate to high (100 Mbps) Turn on stabilization Set the shutter speed to 1/48 for 24fps video or 1/120 for 60fps Adjust the white balance to suit the ambiance Bonus tip: Pro Camera lets you shoot with a flat color profile. This makes it easier to color grade the iPhone footage to make it look more cinematic. USE A GIMBAL The built-in image stabilization on the iPhone SE is good, but you’ll want a gimbal to ensure your moving shots look as steady as possible to get that epic feel. My favorite gimbal to use with the iPhone is the DJI Osmo Mobile 3. It’s affordable and effective. There are many ways to use a gimbal , but here I’m going to cover some basic moves you can easily use to get started. The first one to learn is moving your arm forward and backward. This will let you mimic the effect of a dolly moving toward or away from a subject. Similarly, moving your arm sideways will give you a slider shot effect. It’s better to hold the gimbal with two hands when doing this, though, as it helps keep the camera steady. You can also use the joystick to tilt and pan the camera. This is best used when filming static objects like food and landscapes. You can also make your gimbal shots look more epic when shooting close to the ground. To do this, you have to hold the gimbal sideways. But keeping the video smooth is a bit tricky, as you have to walk at a steady pace while carefully watching your arm movement. Sometimes you’ll want to use the joystick to tilt the camera up for better framing. This move can result in noticeable shaking, but after some practice, you can get some great results. TIMELAPSE AND HYPERLAPSE Creating epic motion timelapse and hyperlapse videos is one of the best tips you’ll pick up here. The Osmo Mobile 3 and iPhone SE combo is great for doing both. One additional thing you’ll want for timelapse videos, though, is a tripod. Fortunately, the Osmo Mobile 3 can be mounted on any standard tripod. Then you can open up the DJI Mimo app and start shooting. Once in the app, you need to go into timelapse mode to set the interval, duration and path. When setting the path, you can choose up to four points, and the gimbal will automatically rotate from one point to another. I typically stick with just two points, which works well for most timelapse shots. Hyperlapse videos are also done through the DJI Mimo app. Go to hyperlapse mode and set the resolution and shooting speed. I suggest shooting 1080p video with the speed set to 30x, which is as high as the settings allow. To capture a hyperlapse video, you need to walk at a normal pace while holding the gimbal as steady as you can. So before you start, look for a clear path to try to ensure you won’t be weaving through people or other obstacles. Even a slight shake can ruin a whole hyperlapse video, requiring you to start again. When you’re done recording, the DJI Mimo app will automatically render the hyperlapse video. To try something a little different, you can also mount the gimbal onto a monopod. This lets you shoot from a higher angle, giving you a different perspective. But you need to be careful when doing this in tight spaces to avoid bumping into people or ceilings. SLOW MOTION There are different ways to capture slow-motion video. The easiest way is the slow-mo mode in the default iPhone camera app, but I suggest you avoid this method if you can because it limits you to 1080p resolution. The best way to get high-quality slow-mo video is to shoot in 4K resolution at 60fps. Then you can slow the video down to 24fps when editing it later. There’s another perk to this: Slowing the video down 40% gives you smoother video with a more cinematic look. This is much better than the super slow-mo look you get from the iPhone setting. But for the best results, shooting at 60fps requires a high shutter speed. This means you need more light, so the optimal setting is outdoors in daylight to prevent underexposed shots. ND FILTERS ARE USEFUL ND filters help to control the exposure, making them useful for shooting outdoors in the daylight. When shooting video, these filters will come in handy when you’re using lower shutter speeds. When you’re using a high shutter speed, less light is getting in, giving you darker exposure. So when you’re shooting at 60fps with a shutter speed of 1/120, you should be fine in bright settings. But for the more typical 24fps shots with 1/48 shutter speed, the ND filter will balance out the brightness and prevent overexposure. These filters are also really useful for timelapse videos. If you want to get the motion blur effect, you have to lower your shutter speed. But this will also let in more light. So to protect your motion blur shot from overexposure, you’ll want to use an ND filter. Bonus tip: Try using a diffusion filter to get a more organic film-like look in your iPhone videos, helping it look less digital. This helps smooth out the highlights, decreases the contrast and provides a less sharp image. EXTERNAL MIC If you need to capture good-quality audio for your video, you’re going to need an external microphone. The type of mic you need will depend on what kind of audio you want to record. For example, a lavalier mic like the Rode smartLav+ works well for interviews since you can clip it on the person you’re talking to. Or if you’re a vlogger, you might prefer a shotgun mic like the Rode VideoMicro, which will help pick up your voice when it’s facing you from a distance. For the best results, you’ll want to watch the audio levels. This is one case in which you’ll need Filmic Pro. The app includes audio gain control so you can set the audio recording level that sounds best to you. You can also tweak other settings, including the audio encoding format and the audio sampling rate. EDITING THE VIDEO When it comes time to edit your video, you don’t need to rely on pricey computer software. Adobe Premiere Rush and LumaFusion are both good apps for editing directly on your iPhone. If your editing needs are simple, I recommend starting with Premiere Rush. There aren’t too many controls to tinker with, making it user-friendly. My favorite feature in Premiere Rush is color correction. The exposure, highlights, shadows and color temperature can all be adjusted to get the video looking the way you want. Adjust these settings to give your video a cinematic color tone. But editing videos on your phone can cause some frustration. The biggest problem is the small screen, making it difficult to juggle multiple video files. And the more files you’re handling in the app, the more likely it is to crash. VERDICT So now you know the best tricks for pushing your iPhone SE to its cinematic limits. But while this affordable iPhone offers great results for the price, remember that it does have its limits. Remember to keep in mind that you have to watch the lightning for your shoots. The iPhone SE’s camera is good in daylight, but the image quality starts to degrade in low light. Pulling off great shots with the phone requires some creative use of lighting conditions. You’ll also want to make sure you’re changing the color grading on your videos. This is the only way you’re going to get a cinematic look with your iPhone videos. To do this, you’ll have to remember to shoot in a flat color profile. Finally, a word about focal lengths: You only have one. This is the most obvious limitation of the iPhone SE. Obviously you’ll have more options with the iPhone 11 Pro, which gives you ultra wide-angle and 2x telephoto lenses. But that phone is more than twice the price of the SE. For the price, though, the iPhone SE can’t be beat. And if this is the phone you already own, now you know how to make the most of it for shooting great-looking video.