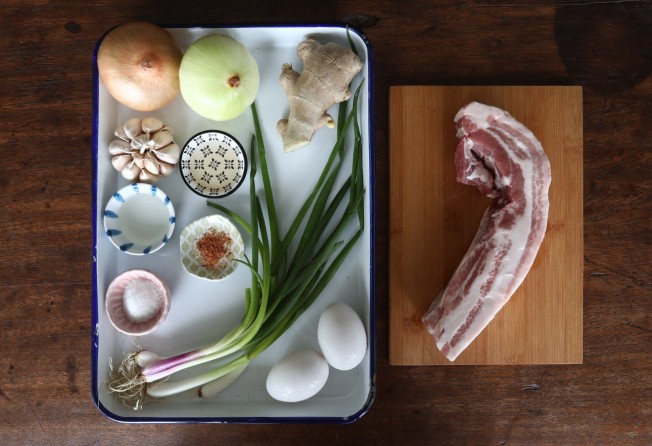
Ingredients for butadon (rice with pork belly and onions). Photo: Jonathan Wong


I love donburi – “rice bowls” that can have toppings as varied as tempura or grilled eel to chicken and egg. Donburi is not a fancy meal; instead, it is hearty and comforting.
Butadon, which features sliced pork and onions, is quick to make, and the recipe varies from cook to cook. I’ve seen versions without onions, for instance. Once the rice is cooked, the rest of the dish takes less than 15 minutes to prepare. You don’t need to marinate the meat, and the pork and onions are cooked together in one pot.
I like to use skinless pork belly, which, because it’s so layered, stays moist; buy a leaner cut, if you prefer, but take care not to overcook it. If you want to save time, buy pre-sliced pork – the kind for Japanese barbecue, not the thinly sliced meat for shabu-shabu/hotpot. It is easy to slice the meat yourself, though.
The amount of topping is sufficient for two moderate eaters. If you are catering for larger appetites, increase the amount of pork to 400-450 grams and increase the seasonings proportionately. The amount of onion can remain the same, and the cooking time doesn’t change. Of course, for bigger appetites you should also serve a larger portion of rice.
To top the butadon, I like to add a raw egg yolk. If you like, you can fry or poach the eggs instead, cooking them so the yolks are soft and runny.
300 grams (10 ½ oz) boneless, skinless pork
Cooking oil, if necessary
2 small onions, about 250 grams (9 oz) in total, peeled
5 thin peeled ginger slices
1-2 garlic cloves, peeled
10 grams (2 tsp) granulated sugar
30ml (2 tbsp) dark soy sauce
30ml (2 tbsp) rice wine
20ml (4 tsp) mirin
2 eggs (or egg yolks)
5ml (1 tsp) white vinegar (if poaching eggs)
1-2 spring onions
Shichimi togarashi (Japanese seven spice), for sprinkling
Black or white sesame seeds, for sprinkling
Cooked Japanese rice, enough for two servings
1 If the pork is a whole piece of meat, cut it into slices about 3mm (⅛ in) thick.
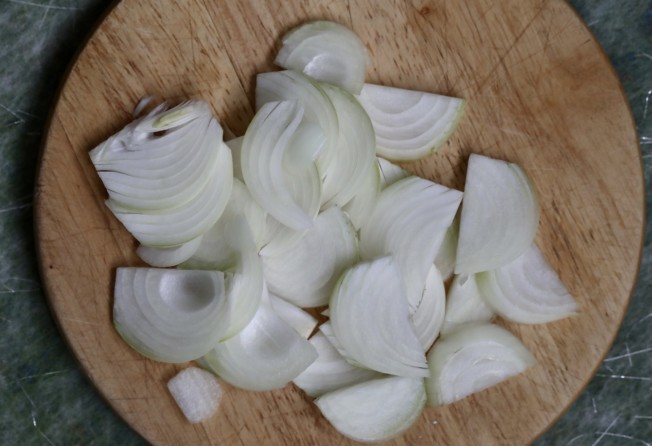
2 Cut the onions in half, then thinly slice them. Finely julienne the ginger and slice the garlic. Mince the spring onions.
3 Put the sugar in a bowl, add 30ml (2 tbsp) of boiling water and stir to dissolve. Mix in the soy sauce, rice wine and mirin.
4 Heat a small skillet (about 15cm/6 inches in diameter) over a medium flame. If you are using pork belly, take one of the fattier pieces of meat and rub it in the inside of the skillet, to grease it. If you are using a leaner cut, pour about 5ml (1 tsp) of oil into the skillet – enough to lightly coat the bottom.
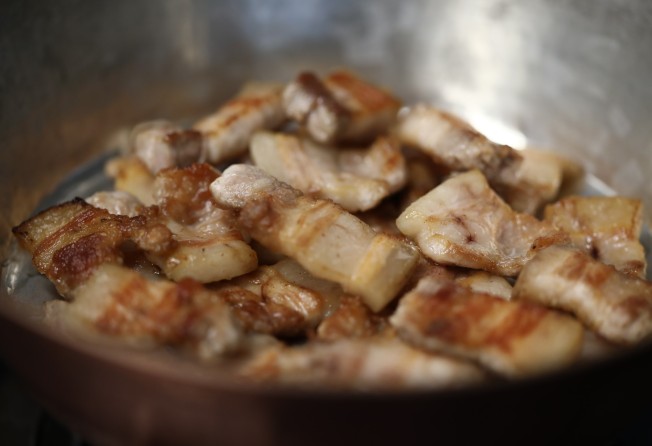
5 When the pan is hot, place the pork slices in one layer in the skillet (you will need to brown them in batches). Sear the meat on one side, then flip the pieces over and brown the other side.
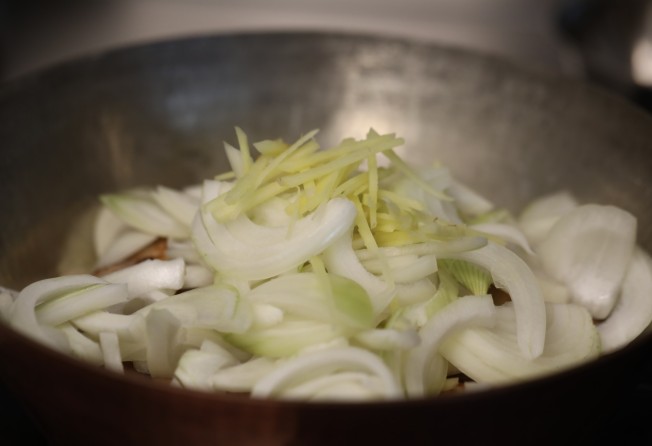
6 Take the pork slices out of the skillet and pour off most of the oil. Put the pork pieces back in the pan and top with the onion, ginger and garlic.
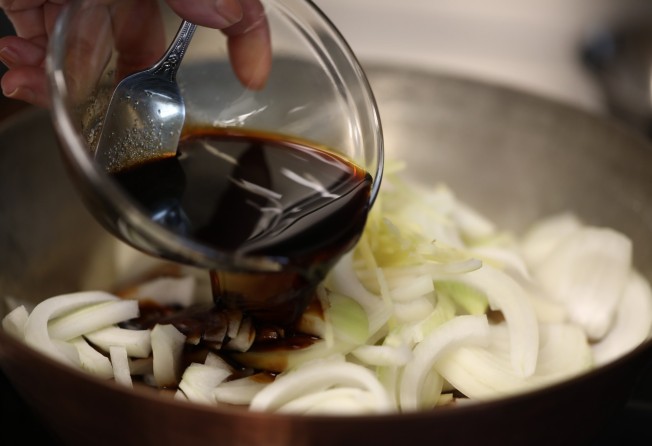
7 Pour the soy sauce mixture into the skillet and place it over a medium flame. Bring the liquid to the boil, then lower the heat, cover the pan with the lid and simmer for a minute.
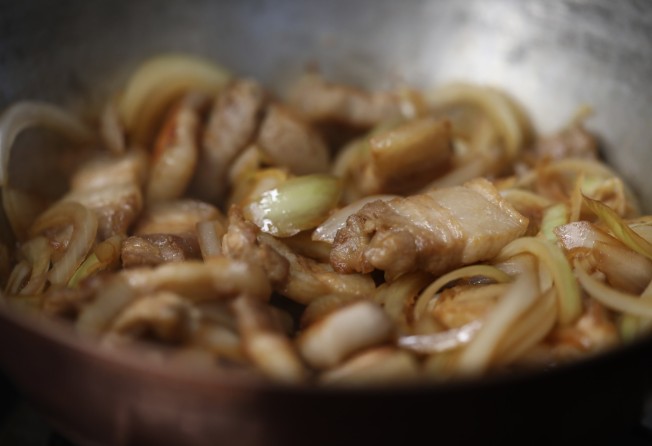
8 Mix the ingredients together, then simmer for about two more minutes, or until the pork is cooked and the onion is crisp-tender.
9 Scoop hot cooked rice into two donburi (or bowls of similar size), then divide the pork, onion and sauce over each serving. Make an indentation in the middle of the toppings.

10 Separate two eggs and place one yolk over each serving. Sprinkle with shichimi togarashi, sesame seeds and spring onion, then serve immediately. The diner should mix the egg yolk into the other ingredients.
11 If you don’t want raw egg yolks, poach the eggs: bring a pot of water to the boil and add the vinegar. Use a spoon to swirl the water to create a vortex, then crack an egg and put it into the vortex. Poach until done, then use a strainer to remove the egg from the water and blot it on paper towels. Repeat with the second egg. Place the egg on each serving of the pork and onion before scattering with shichimi togarashi, sesame seeds and spring onion.
12 If you want a fried egg, heat oil in a skillet. Crack the eggs directly into the skillet, then place the lid on top. Cook until the yolk is softly set, then place an egg on each serving of the pork and onion before scattering with shichimi togarashi, sesame seeds and spring onion.
Styling: Nellie Ming Lee | Kitchen: courtesy of Junk Kitchen
Like this recipe? Look for more in the SCMP Post Magazine, or on SCMP Cooking.