Hokkaido cheese tarts were, at one time, a fashionable Japanese import to Hong Kong, with people waiting in line for an hour or more to buy them. The fad has died down, but they’re still a delicious and easy dessert. I’m not pretending that this recipe is the same - for one thing, it doesn’t use dairy products from Hokkaido or anywhere else in Japan. But once you have the dough and filling made, you can make and bake these tarts in less time than it takes to queue for them - and you can serve them straight from the oven, so they’re still soft and gooey. When the tarts cool, the filling becomes firmer.
The recipe for the pate a sucre is adapted from one in The Pie and Pastry Bible, by Rose Levy Beranbaum.
The ingredients for the filling should be at room temperature before mixing them, especially the cream cheese, which, if cold, is very difficult to beat until smooth.
There's no need to bake all the tarts at once; the dough and filling can be refrigerated and used as needed. For this amount of filling, you'll only need one or two discs of dough. The rest of the dough can be refrigerated for about two weeks or frozen for longer storage.
Make the pâte à sucre. Put the flour, sugar and salt in the bowl of a food processor and pulse to combine. Add the chunks of butter and pulse until they're chopped to the size of small peas, then transfer this mixture to a large bowl. Whisk the egg yolks with the cream and vanilla, then pour this into the bowl holding the flour and butter. Mix the dry and wet ingredients together to make a cohesive dough that's neither sticky nor dry; if necessary, drizzle in a little more cream. Briefly knead the dough, then divide it into three even pieces. Shape each piece of dough into a disc, wrap with cling-film and refrigerate for at least an hour (although longer is better).
If you've refrigerated the dough for more than an hour, leave it at room temperature until it's slightly pliable. On a lightly floured work surface, roll the dough so it's about 3mm (⅛in) thick. Use a round biscuit cutter to cut circles of dough large enough to line 20-24 small tartlet pans that hold about 40ml (2tbsp and 2tsp). Settle each circle of dough into the pan so that it smoothly fits the contours. Press on the dough with your thumbs to thin it out slightly and trim off the overhang. Refrigerate the dough-lined pans for about 30 minutes.
Preheat the oven to 200°C (390°F). Cut squares of aluminium foil just a little larger than the tart pans. Gently press the foil over the dough into the contours of the pan; this helps to hold down the dough so it doesn't puff. Bake at 200°C for 10 minutes then remove the foil. Turn the heat to 180°C (350°F) and bake for about five more minutes, or until the tart shells are very pale golden. Take them from the oven; leave the oven on at 180°C.
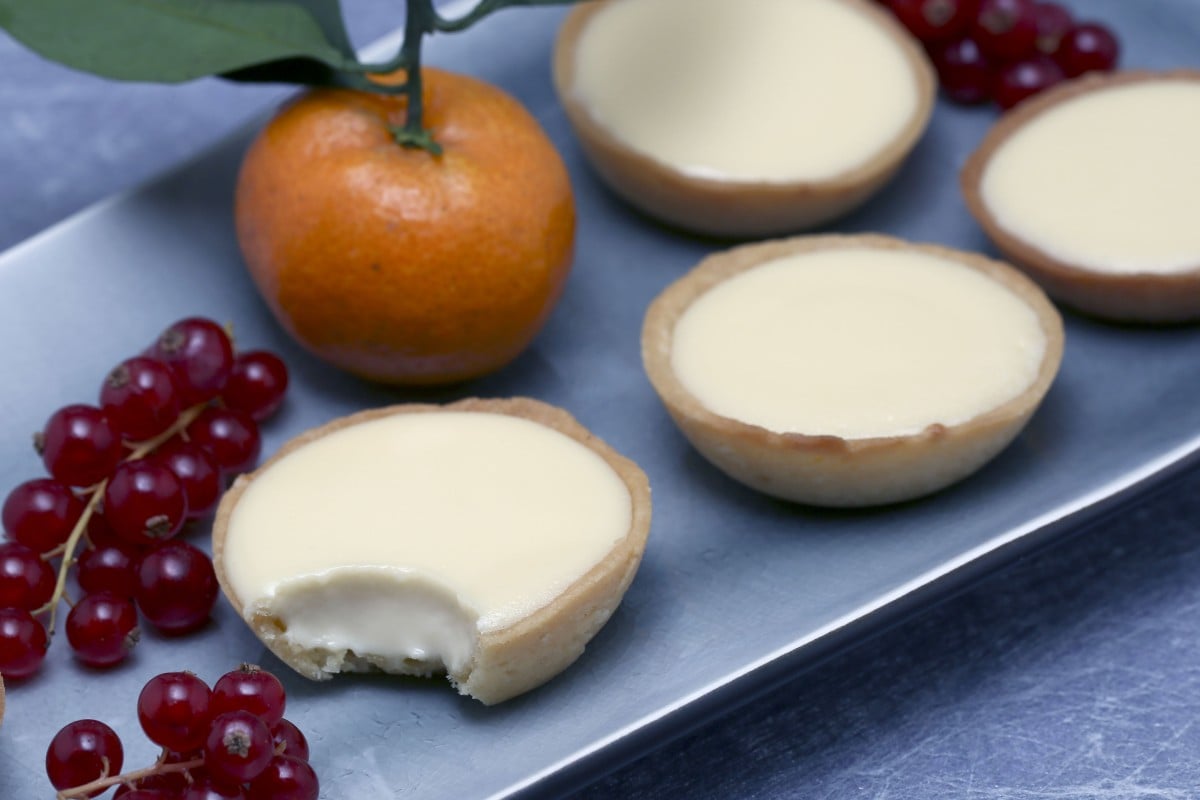
While the tart shells are cooling, make the filling. Put the room temperature cream cheese, mascarpone and crème fraîche in the bowl of a clean, dry food processor and mix until smooth. Add the sugar, egg yolk, cornstarch and the vanilla extract or lemon zest and mix thoroughly, then scrape the ingredients into a bowl. (You can also do this in a bowl with a hand mixer.)
Carefully take the tart shells from the pans and place them on a baking tray. Spoon some of the filling into each tart shell to fill it entirely. Bake at 180°C (350°F) for 4-5 minutes: the filling will be a little wobbly. Serve immediately.