With this fun and customisable recipe, you can make and enjoy snowy skin mooncakes of any colour any day, and not just during the Mid-Autumn Festival. Start with the salted egg yolk custard filling. Then try a different filling, such as ube halaya jam.
This recipe uses cooked salted duck egg yolks, easily found in the frozen or refrigerated sections of Asian food stores or online in vacuum-sealed packages.
Note: you will need a mooncake mould press with a capacity of 50g to 100g (1¾ to 3½ oz)
In a pan over medium-low heat, toast glutinous rice flour until aromatic. Set aside.
Make the filling. In a saucepan, add all the ingredients and whisk until fully combined. Place over medium-low heat and whisk continuously. When moisture thickens, pulls away from saucepan and balls up, remove from heat. Smooth out using a flexible spatula; don't worry if it is lumpy. Cover with plastic wrap and refrigerate for at least 1 hour.
Make the mooncake skin. Add all the ingredients to a heatproof bowl and whisk until smooth. Cover with aluminium foil. Steam over medium-high heat for 30 minutes or until the mixture solidifies and is no longer runny. The dough is ready when it resembles a stiff jelly and an inserted toothpick or bamboo stick comes out clean.
Transfer the dough to a stand mixer fitted with paddle attachment. Mix on low speed until shiny and smooth (1-2 minutes). Do not overwork the dough. Allow it to cool to the touch.
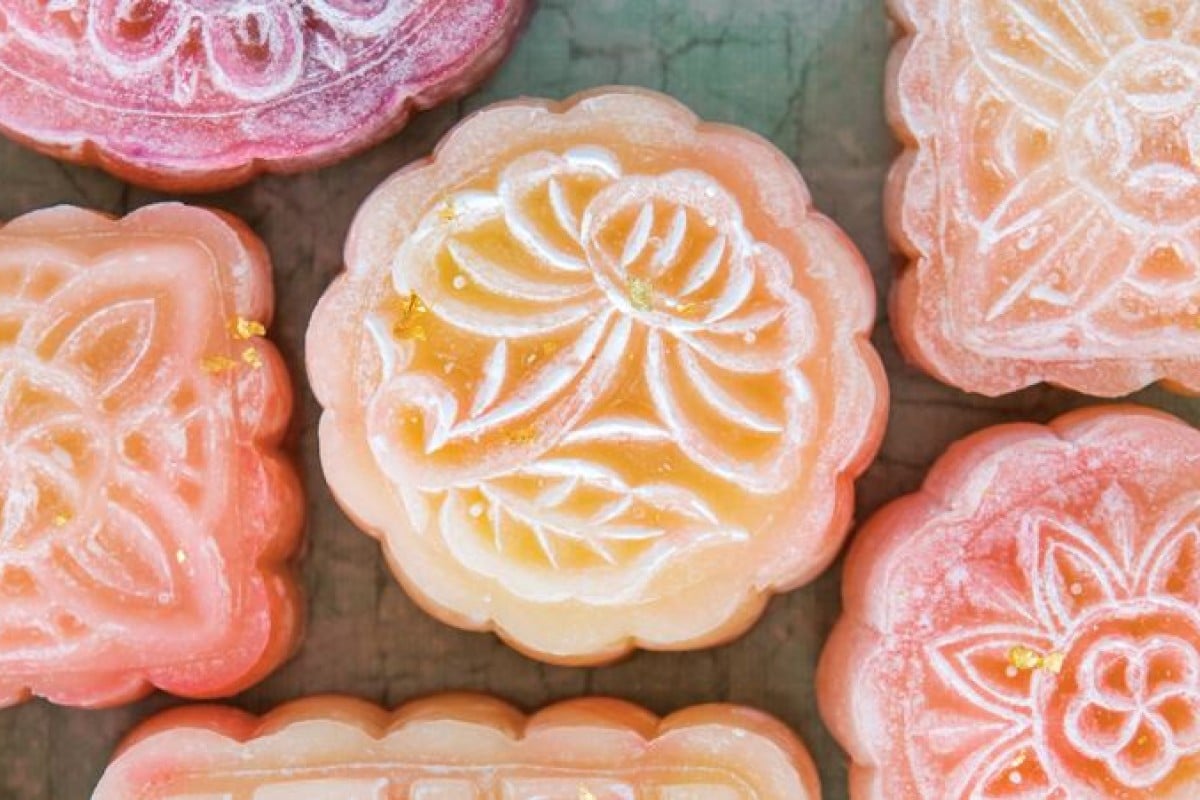
Wearing food-safe gloves, assemble the mooncakes. If using, add drops of food colouring to the dough, then stretch and mix dough until it is marbled with colouring. Scoop up a heaped tablespoon (about 20g) of dough, roll into a ball and flatten between two layers of plastic wrap. Remove wrap. Take a heaped tablespoon of filling (about 25g) and roll into a ball. Wrap dough around filling, pinch in the seams, and form a smooth ball. Toss ball in toasted flour. Dust mooncake mould press with toasted flour. Use the press (with stamp of your choice) to gently stamp the dusted ball. Repeat to make about 14 more mooncakes. Brush them with oil and decorate with gold dust or flakes if using.
Cover and refrigerate for a few hours or up to 4 days. Remove mooncakes from fridge and allow to reach room temperature before enjoying.